Tag Archives: Dough

Double Lemon Raspberry Swirl Pie

4 Jan

If you can’t tell by how many pictures I took of this pie…it is one of my new favorites. I have had a tab open on my laptop for months with the recipe, taunting me, begging me to make it. But, I am the only pie eater at my house (the kids tap in here and there, but they never eat an entire slice – I of course step in and make sure nothing goes to waste ;)). This means that I need a very good reason to make pie. “What are you doing for Christmas Eve?” asked my parents. “Want to come over for dinner?”

“YES! Can I make pie?”

Raspberries and Lemon…just screams ‘Christmas,’ don’t they? I know, I know – slightly wrong season. But it turned out so very festive looking anyways! I love when food is pretty on top of tasting good. And oh, does this pie taste good!

photo 2

Ingredients

Raspberry Filling

1 package (10 oz) frozen raspberries in syrup, thawed
1 Tbsp sugar
1 Tbsp cornstarch
1 cup fresh raspberries

Lemon Filling

1 package (8 oz) cream cheese, softened
4 oz white chocolate baking bars, melted, cooled
1 can (14 oz) sweetened condensed milk
1/2 cup lemon juice
1 cup whipping cream, whipped

Lemon Curd

4 egg yolks
2/3 cup sugar
3 Tbsp lemon juice
1/4 cup butter, softened
1 tsp grated lemon peel
Have ready, prepared pie crust.
In blender, place thawed raspberries and syrup. Cover; blend on medium speed 1 minute. Reserve 1 tablespoon. In 1 1/2-quart saucepan, mix remaining blended raspberries, 1 tablespoon sugar and the cornstarch over medium heat until boiling and thickened. Pour into baked shell; top with fresh raspberries.
In large bowl, beat cream cheese and white chocolate with electric mixer on medium speed until smooth. Mix in condensed milk until smooth. Stir in 1/2 cup lemon juice. Gently stir in whipped cream. Spread over raspberry filling. Refrigerate.
Meanwhile, in 2-quart saucepan, mix egg yolks and 2/3 cup sugar. Mix in 3 tablespoons lemon juice, the butter and lemon peel. Heat over medium-low heat, stirring constantly, until mixture thickens. Refrigerate 30 minutes. Spread over lemon filling to within 1 inch of edge. Drizzle reserved blended raspberries over lemon curd, and swirl using toothpick. Refrigerate 1 hour before serving. Garnish as desired. Cover and refrigerate any remaining pie.

photo 3

photo 4

Original recipe: http://www.pillsbury.com/recipes/double-lemon-raspberry-swirl-pie/7d929ada-ef52-4c66-a557-217df9ab72c7/?nicam4=SocialMedia&nichn4=Pinterest&niseg4=Pillsbury&nicreatID4=Post

Perfect Pie Crust

3 Dec

Since I’m posting all these pie recipes, I guess I should post the crust too!

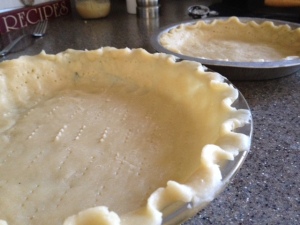
photo 1

Ingredients

  • 1-1/2 cup Crisco (vegetable Shortening)
  • 3 cups All-purpose Flour
  • 1 whole Egg
  • 5 Tablespoons Cold Water
  • 1 Tablespoon White Vinegar
  • 1 teaspoon Salt

Preparation Instructions

In a large bowl, with a pastry cutter, gradually work the Crisco into the flour for about 3 or 4 minutes until it resembles a coarse meal. In a small bowl, beat an egg with a fork and then pour it into the flour/shortening mixture. Add 5 tablespoons of cold water, 1 tablespoon of white vinegar and 1 teaspoon of salt. Stir together gently until all of the ingredients are incorporated.

Separate the dough into thirds. ***Note: Separating it into thirds will result in three thin crusts. If you prefer a more substantial crust, separate it in half.*** Form 3 evenly sized balls of dough and place each dough into a large Ziploc bag. Using a rolling pin, slightly flatten each ball of dough (about ½ inch thick) to make rolling easier later. Seal the bags and place them in the freezer until you need them. (If you will be using it immediately it’s still a good idea to put in the freezer for about 15 to 20 minutes to chill.)

When you are ready to use the dough to make a crust, remove from the freezer and allow to thaw for 15 minutes. On a floured surface roll the dough, starting at the center and working your way out. (Sprinkle some flour over top of the dough if it’s a bit too moist.) If the dough is sticking to the countertop use a metal spatula and carefully scrape it up and flip it over and continue rolling until it’s about ½ inch larger in diameter than your pie pan.

With a spatula, lift the dough carefully from the surface of the counter into the pie pan. Gently press the dough against the corner of the pan. Go around the pie pan pinching and tucking the dough to make a clean edge.

For pre-cooked crusts, prick unbaked crust with fork and bake at 400^F for 8-10 min.

Original recipe: http://thepioneerwoman.com/cooking/2007/12/p-p-p-pie_crust_and_its_p-p-p-perfect/

photo 3

Bacon Cheddar Pinwheels

21 Nov

“Mom! These are the best ever!” Palm to the forehead…why do I bother cooking anything that takes even a smidgen of effort? My kids always rant and rave about the things I throw together last minute, and poke their fork hesitantly at the things I slave over. I’ll tell you why I bother; I do it because I like my food to be interesting. So, I’ll keep doing it until one day my children develop taste buds and an appreciation for good food. In the mean time, however, I do thank my lucky stars that there are quick fixes out there that do taste pretty darn good.

photo 2

Ingredients:

1 pkg refrigerated crescent rolls

6 pieces of bacon, cooked crispy and broken in bits

shredded cheddar cheese

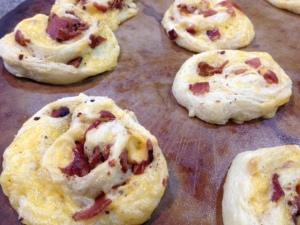
Lay out crescent roll dough in 2 rectangles, and cover with cheese and bacon bits. Tightly roll dough, sealing the edges and cut 4-5 individual pinwheels from each rectangle. Place on baking sheet and bake 375^F for 12-15 min.

photo 3

Play Dough

18 Nov

I’m way behind on posting lately – I have recipes piling up and I’m starting to forget about them. Similar to my laundry piles. I’d rather blog than fold laundry, so guess what gets my attention this morning? 🙂

We made play dough at Grandma’s the other day. Everyone wanted different colors to begin with, but purple eventually won. Quick and easy and very salty! So don’t let the kiddo’s take a taste test. Or do…they won’t do it again. 😉

photo 1


Ingredients:

1 cup flour

2 tsp cream of tartar

1 cup water

1/2 cup salt

1 Tbsp oil

food coloring of choice

Mix dry ingredients together in a frying pan. Add wet ingredients and mix. Cook over medium heat, stirring constantly, until mixture pulls away from the sides of the pan. Put on wax paper, knead. Store in ziplock bag.

photo 2

Cinnamon Swirl Bread

11 Oct

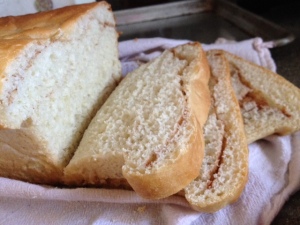
I asked my husband to make this Cinnamon Swirl Bread recipe that I found online, and was so excited when he finally did! When I took a few pictures of it, he asked, “Are you going to put it on your blog?” I said, “Of course!” And he added, “Well, I better give you the recipe then.” I was slightly confused, considering the fact that I was the one that gave him the recipe…or so I thought. He’s been obsessed with making the perfect loaf of bread lately, and it’s a good thing I decided to add this recipe to the blog because, apparently, he made up his own and the only place it resides is in his head. A sudden case of amnesia, and this piece of cinnamon-swirl, gooey goodness could have been lost to us forever. That would have been a real tragedy! That and the loss of my husband’s mind…I’d miss that too.


photo 1

Ingredients:

3 cups bread flour

1 1/2 cups warm water

1/3 cup sugar

1 Tbsp yeast

1 tsp salt

butter – room temperature

cinnamon/sugar (about a 3:1 ratio, ex: 4 tsp cinnamon, 1/4 cup sugar)

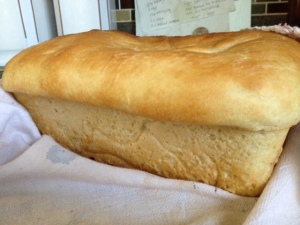
In a smaller bowl, mix warm water and sugar. Add yeast and allow it to proof. Sift together flour and salt, then add yeast mixture. Knead together until dough pulls away from your fingers – a little sticky still and not too dense. Cover the dough and let rise to double in size. Roll out dough to 1/2″ inch thick rectangle and spread a layer of softened butter over surface (the thicker the butter, the more pronounced the marbling in your loaf). Sprinkle the butter layer with a generous coating of cinnamon/sugar mixture. Fold the dough in thirds long-ways, then fold in thirds again from the opposite sides, forming a loaf. Place in greased bread pan and bake at 350^F for 20 minutes. When bread is done baking, remove from oven and brush top crust with butter. Best when served warm!

*You can use regular flour, but bread flour allows your loaf to rise and hold it’s shape better. Our all-purpose flour loaves always turn out much more dense.

photo 3


Katie’s Sugar Cookies

20 Sep

I have no idea who ‘Katie’ is (that’s how they are listed in my mom’s recipe cards, and I have to give credit where credit is due!) – but she sure knew how to make sugar cookies! I prefer a little bit of ‘fluff’ to my sugar cookies. Soft and perfectly puffy. Try this recipe, and never again will you buy those pre-packaged cookies, with the inch of frosting and sprinkles, from the vending machine! You will be spoiled. And you will love it. I may or may not have eaten four in a row yesterday and called it lunch.

photo-181

Ingredients:

1 cup evaporated milk

1 Tbsp vinegar

1 cup butter

2 cups sugar

2 eggs

1 tsp vanilla

5 cups flour

1 tsp salt

1 tsp baking soda

1 tsp baking powder

In a separate, small bowl, add vinegar to evaporated milk and allow to sit. Blend butter, sugar, eggs, and vanilla together until smooth. Add milk mixture to butter mixture and blend well. Add dry ingredients until blended. Make 2-4 large balls of dough. Cover with plastic wrap and place balls of dough in the fridge for at least 1 hour to make it firm. On a lightly floured surface, roll out dough to 1/4″ thickness and use cookie cutters to make shapes. Bake at 425^F for 7-8 minutes. Cookies will not brown – if they start browning too much you will loose the airiness and they will instead be crunchy. Top with Buttercream Frosting.

photo-182

S’more Cookies

9 Sep

So, we bought a new car a few weeks ago. Super excited!!…And then our other car died. This is a little thing I like to call, “Murphy’s Law.” We traded in our perfectly good car that ran fine but was getting a little squished for our growing family, and swapped it out for a new one that upped our monthly payments a bit, putting us on a tighter budget. Literally days later, the car my husband takes to work – the car I got when I turned 16 and have been driving for 15 years – the car that we have been struggling to keep alive for the last 2 years but thought we had gotten repaired enough to at least get a few more years our of it – the car that I love and wanted to pass on to my kids when they are old enough to drive but have been getting increasingly frustrated with as it continues to break down time and again…you get the gist – well, that car went kaput again. And we can’t really afford to replace it. We sat down, chatted about our options, and decided: one last fix. One last fix and then…I can’t even say it. So we did it…and then two days later, I get that dreaded call; “The car died again.” Sigh. Of course, this time it was at 10:00 at night. My kids were all asleep and I couldn’t go get my poor, stranded husband! Luckily, I live in the world’s greatest neighborhood. I gave one of my neighbors down the street a call, apologized profusely for calling so late, told her the conundrum I was in, and asked if she wouldn’t mind sitting with my kids while I went to rescue my husband. And instead of a, “Sure, I can come down,” I got a, “You stay right where you are. I’m sending my husband to go get yours. He has jumper cables and they can try to get it started.” Did I mention I live in the world’s greatest neighborhood? They got it started and almost made it home before the poor thing died again. So, while my husband made it home at last, the car spent the night on the roadside. Then, this morning, one of our other neighbors offered to go help us tow it. He not only towed it, but took it to a friend who was able to locate the problem (faulty part), and then towed it again to where we had had the part installed so that tomorrow we can have them replace it. All this on a Sunday – day of rest and all. I think I mentioned that I live in the world’s greatest neighborhood.

We shall see what news tomorrow brings on my little car…hopefully it really is just a bad part and they can take care of it. Sigh. In the meantime, I had some serious thank you’s to spread to the world’s greatest neighbors. I made these cookies that I have made way too many times this summer. I am smitten by them. I am in deep smite. Luckily, this time I gave away most of them and didn’t eat half the batch myself. I love finding new cookie recipes that are just a little outside of the box! And, in my opinion, these are way better than real s’mores. I have a tendency to dumb-down even the easy recipes, so for this one I don’t use unsalted butter (I just never have it on hand!), and I use regular table salt instead of kosher. The first time I made them I didn’t have chocolate bars either, and they still turned out great. Yay for recipes that you can fudge a little. 🙂

P.S. So, we delivered the cookies to our neighbors, and came home with a box of peaches…such nice people. I think a lot of the world’s problems would be solved if everyone could be so thoughtful.

photo-165

Ingredients:

  • 11 Tablespoons unsalted butter, softened
  • 1 cup brown sugar, packed
  • ½ cup granulated sugar
  • 2 large eggs
  • 1 teaspoon vanilla
  • 1 teaspoon baking soda
  • ½ teaspoon sea salt
  • (optional) 1 teaspoon cinnamon
  • 2 ½ cups flour
  • 1/2 cup semi-sweet chocolate chips
  • 1 cup mini marshmallows
  • 3 regular sized Hershey’s bars, broken into pieces
  • 1-2 packages graham crackers, broken into squares

Instructions

  1. In a medium bowl, whisk together the flour, baking soda, sea salt and cinnamon to combine. Set aside.
  2. In the bowl of an electric mixer, cream butter with white and brown sugar until light and fluffy. Add the eggs and vanilla and mix until combined.
  3. Add the flour mixture to the butter mixer and combine on low speed.
  4. Fold in the chocolate chips and marshmallows. Chill dough in refrigerator for 1 hour to overnight (I did one batch right away and another after chilling overnight and found there was no difference.)
  5. Preheat the oven to 375 degrees. Line baking pans with parchment paper. I used one 11×17 pan and one 9×13 pan but you can really use any sized pans you want.
  6. Lay out graham crackers side by side on the pans as close as possible (they should be touching). I used 16 graham cracker squares on one pan and 10 squares on another. You may have to add or remove graham crackers according to how much dough you have. If you want your cookies thicker you will use more dough and less graham crackers.
  7. Place tablespoons of dough on graham crackers about 1 – 1 ½ inches apart. I averaged about 1 1/2 tablespoons of dough per graham cracker square as seen in the picture above. Press down slightly with fingertips.
  8. Bake for 5 minutes then remove from oven to press Hershey’s bar pieces on to the top. You can place as many pieces or as little as you want depending how much chocolate flavor you want.
  9. Bake for an additional 5 – 7 minutes or more if your cookies are thicker. They will be done when the edges begin to turn golden brown. Remove to a wire rack to cool. For clean cutting make sure cookies are completely cool and cut with a sharp knife.photo-164Original recipe found here: http://www.the-girl-who-ate-everything.com/2011/06/smores-cookies.html


Biscuit Dough Donuts

16 Jul

My grandparents celebrated their birthday’s this week – my grandma on the 14th and my grandpa today, the 16th. He is turning 95, and she would have been celebrating 93 – she passed away at the end of January this year. I miss her laugh and her voice. My grandpa is cranky and opinionated and is the scariest driver – who gave him a license anyways? 😉 – and I love him to death. I think he has struggled more than he wants to admit from the loss, but I know he has gained a greater appreciation for what they had together since she has been gone. My parents took the opportunity to make the drive to be with him on his birthday and they had dinner the other night with my cousins at the Ranch Enchilada (it was the Whole Enchilada when I was a kid, and I still have a hard time calling it anything else!), and today did breakfast at IHOP. My grandpa made the comment that he doesn’t know how other restaurants stay open when there is an IHOP. 🙂 I wish I could have been there too. One thing about death, as sad as it is, it has a funny way of reminding us how important those still here are. I am so grateful for my family – for my parents and my sisters, and my cousins who we reconnected with over our stay there for the funeral. For my sweet grandpa who gives hugs like he never did before, and has learned to say things like, “Thank you” and “I was wrong” because of the new appreciation he has gained for life and those he loves.

In honor of my grandma, I made her ‘homemade’ donuts. At her funeral, everyone talked about making donuts with Grandma. You could count on two things at her house – grapefruit and  donuts. I’m on the younger side of all the grandkids, and I had never known that she made donuts! We always had deli pastries or store bought donuts (the grapefruit never went anywhere…I’m sure she’s still having one for breakfast every morning!). But in all my years, I don’t think I saw her use the kitchen once, except the little toaster oven to warm the pastries. So, I was excited to get the recipe for these famous donuts and try them out. I laughed out loud when my cousin sent me the recipe. Biscuit dough – so easy, and so Grandma. 🙂 She would punch the hole in the middle with the lid of a salt shaker. I’m going to have to get one, just for tradition’s sake. They really are super yummy! I was expecting them to taste more bicuit-y, but they are light and perfect and literally take 5 minutes to make. Thanks, Grandma! Love you and miss you.

photo-59

Ingredients:

Cooking oil

Refrigerated biscuit dough

Icing or sugar to coat

Pour about 2″ of cooking oil into a large pot and preheat to about 350^F – be careful not to overheat. Open cylinder of biscuits, remove and separate into individual biscuits. Poke holes in the middle of each biscuit with finger, knife, or salt shaker lid :). Carefully place biscuits into hot oil and cook until bottom is golden brown, then flip and cook other side. Remove from oil with a slotted spoon and allow to drain on paper towels until cool. Top with icing or roll in sugar – granulated or powdered. Repeat for donut holes.

photo-60


Sugar Cookie Bars

28 Jun

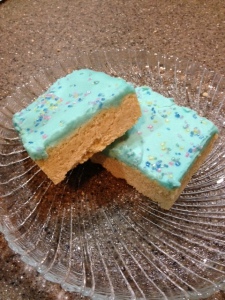
We had some sweet neighbors bring our family dinner after the baby was born, so I had to (had to) make treats to thank them. Unfortunately, I didn’t give them all away and decided to eat half the pan myself. I have a deep and abiding love for sugar cookies, but I kind of hate to make them – they are a pain. Mix the dough, chill the dough, roll the dough, hurry up and cut out your shapes and re-roll and re-cut…all before the dough gets too warm to work with. And if you aren’t fast enough, you have to re-chill and then start all over again. A lot of work! No good. So I only make them on real special occasions (I will have to do it eventually because I do have a killer recipe – super soft and fluffy…but I’m getting way ahead of myself! you’ll get those on one of those special occasion posts :)). So! Imagine my delight, stumbling upon this awesome recipe that gives you some smashing sugar cookies in super simple bar form. Hopefully I didn’t find it so easy that I make them all the time. Remember that baby bulge I still have to get rid of?

photo-28

Cookies:

1 cup butter, room temperature

2 cups sugar

4 eggs

2 tsp vanilla

5 cups flour

1 tsp salt

1/2 tsp baking soda

1 tsp lemon zest (optional)

Frosting:
1/2 cup butter, room temperature
4 ounces cream cheese (1/2 of an 8 oz block) softened
1 tsp vanilla (I used almond extract for half of the frosting)
¼ tsp salt
4 cups powdered sugar
5 Tbsp milk
food coloring (if desired)
Cream butter and sugar until fluffy. Add eggs, one at a time, mixing after each egg. Add vanilla and mix well. In a separate bowl combine flour, salt, baking soda and stir with a whisk to combine. Add to wet mixture and mix just until combined. Spread on a greased baking sheet (use a 13 x 18 pan). Bake at 375 degrees for 10-15 min, until light golden brown or until a toothpick comes out clean (they won’t look done so do the toothpick test). Cool completely and frost.
For the frosting: Combine butter and cream cheese until smooth and creamy. Add vanilla and salt. Add powdered sugar in 1-2 cup increments until combined, then add milk a little at a time and mix until smooth and spreading consistency. You may not need all the milk! Spread over cooled cookie bars.

Blueberry Cinnamon Rolls

27 Jun

So, I have 2 confessions to make:

1. I love cinnamon rolls

2. I am an epic failure at making cinnamon rolls

When I was about 12, my grandma had me come over to her house for a bread making tutorial. She spent hours with me teaching me what temperature to keep the water at to activate but not kill the yeast, how to roll out the dough and get rid of air bubbles, the best conditions for rising bread…the result? She declared me the worst bread maker she had ever had the pleasure of teaching. That hasn’t stopped me from continuing my efforts, however :). About 1 in 10 tries I get it right. This wasn’t one of those. But I did like the recipe – even though my dough didn’t rise (I blame the yeast…something has to be wrong with it) the dough was still soft and easy to work with. The rolls didn’t even get close to doubling in size, but they looked pretty enough and tasted even better. I just had a baby and am homebound for a bit, which means I make things that aren’t really all that conducive to shrinking my post-baby-belly. This was my effort to make cinnamon rolls into a healthy treat. If you add fruit, that makes it good for you, right? 😉

photo-22

Ingredients for the dough:
1 cup milk
⅔ cup sugar
1 ½ tablespoons active dry yeast
1 stick unsalted butter, softened
2 large eggs
1 teaspoon finely grated lemon zest
1 teaspoon fine sea salt or kosher salt
4 ¼ cups all-purpose flour, plus more for dusting

Ingredients for the filling:
2 tablespoons softened butter
10-ounces frozen berries, not thawed Use any type of berries you like. We love blueberry and raspberry. I used the tiny wild blueberries for the rolls in the photo.
½ cup sugar
2 teaspoons cinnamon
2 teaspoons cornstarch

Ingredients for the glaze: 
¾ cup confectioners’ sugar
3 tablespoons butter, melted
1 ½ tablespoons half and half or whole milkDirections for the dough:
1. Warm the milk in the microwave or on the stove top over moderately low heat until it reaches 110-115°F. Remove from heat and pour the warm milk into the bowl of a standing electric mixer fitted with the dough hook. Stir in the sugar and yeast. Let stand until the yeast is foamy, about 5 minutes.2. Add the softened butter, eggs, grated lemon zest and sea salt. Add the flour and beat at medium speed until a soft dough forms, about 3 minutes. Increase the speed to medium-high and beat until the dough is soft and supple, about 10 minutes longer.3. Scrape the dough out onto a lightly floured surface and knead it with your hands 2 or 3 times. Form the dough into a ball and transfer it to a lightly buttered bowl. Cover the dough with plastic wrap and let stand in a warm place until doubled in size, 1 to 2 hours.

4. Generously butter a 9-by-13-inch baking pan or two 9-inch baking pans.

5. Turn the dough out onto a lightly floured work surface and, using a rolling pin, roll it into a 10-by-24-inch rectangle. In a medium bowl, toss the frozen raspberries with the sugar, cinnamon and cornstarch. Spread the softened butter over the dough, then scatter the raspberry mixture evenly over the dough.

6. Tightly roll up the dough to form a 24-inch-long log. Working quickly, cut the log into quarters. Cut each quarter into 4 slices and arrange them in the baking pan(s), cut sides up. Scrape any berries and juice from the work surface into the baking pan between the rolls.

7. Cover the rolls and let them rise in a warm place until they are puffy and have filled the baking pan, about 2 hours.

8. Preheat the oven to 375°F. Bake the rolls for about 25 minutes, until they are golden and the berries are bubbling. Cover with foil if browning too fast.

9. Transfer the pan to a rack to cool for 30 minutes.

10. In a small bowl, whisk the confectioners’ sugar with the butter and half and half (or milk) until the glaze is thick and spreadable. Invert the rolls onto the rack, then invert the rolls again onto a platter. Drizzle glaze over rolls and spread with an offset spatula, if desired. Serve warm or at room temperature.

Notes:

~ To make ahead, prepare the recipe through Step 7. Cover the rolls, refrigerate overnight and then return to room temperature before baking.
~ For variation the sweet rolls can be filled with a variety of frozen fruit. Try blackberries, strawberries, blueberries or chopped sweet cherries.